CTD-data: how to use and present


Authors: Thea Båtevik, Magnus André Hulbak, Patricia Koch, Øyvind Langenes, Cecilie Gotaas Sørensen.


CTD (conductivity, temperature and depth) is an ocean research tool that is used during research cruises to measure the physical properties in the water. Watch this video to learn more about CTD sampling.

When the CTD has returned to the surface after measuring the data, the crew on the vessel extracts a sea-bird file from it, which they then convert in to a CNV-file. This CNV-file will be required for:

  1. 1. visualizing how physical properties change (e.g. depth and location) in Ocean Data View (ODV),
  2. 2. importing CTD data into Excel for further analysis and representation,
  3. 3. importing CTD data into R for further analysis and representation.

The CNV-file is a raw data file, and it’s very difficult to obtain information from directly, so it’s usually transferred in to specific programs like ODV(ocean data view) or R. A CNV-file looks like this.


Visualizing physical properties in Ocean Data View (ODV)

Open "Ocean Data View"

This will be the first interface you meet. Press File in the top left corner and select New.

Create a folder where you wish to save your data and results. To do so:
1. Choose a name for your collection.
2. By default the Files of type should be "Collection Files (*.odv)". If they are not, change it.
3. Press Save after you have named your collection and chosen odv as collection files.

Choose User specifies variables manually in order to tell Ocean Data View what variables we are looking at (e.g. salinity)

If you want to add more variables than the classic salinity, depth and temperature, press New.

For example you can make oxygen as a new variable, with mL/L as your unit. This of course depends if there is an oxygen meter connected to the rosette.

Check that the new variable is added, and press OK.

Keep depth as primary variable (predictor) and press OK.

This screen appears.

Select Import and then Sea-Bird CNV.

Navigate to the folder where your CNV data is stored, select all (Ctrl+A) and click on open.

The 'Meta Variable Association' window should show up now. Press ok without selecting anything.

Select Temperature as a Source Variable and click Associate.

Click OK.

This screen appears.

Go to View, Layout Template and select Full Screen Map.

You should now get a full screen map like this. This is an overview of the sampling area with coordinates on the XY-axis. Blue dots represent the different CTD-stations.

After you have gotten the full screen map, right click Manage Section, then choose Define Section. From here you should mark your transect by making a continuous line (marked red) on either side of your station points (i.e. don't push directly on the blue dots), as shown in the next picture.

When all your stations are included, push Enter.

After you have pressed enter, you should get a pop-up box called Section Properties. Give your transect a section name and press ok.

To adjust the transect, right click and push Manage Section, Section Properties, change the Mean Width as you see fit, then OK, as shown in the next pictures.

When this is done, we have to make a transect for the different variables (i.e. temperature, salinity and/or oxygen concentration). Go to View, Layout templates and Section Window (NB! Choose a section window depending on what you want to show)

Go to View and then Layout Templates. You can choose different Section Windows to change the display.
Use the F8-F12 keys to navigate quicker.

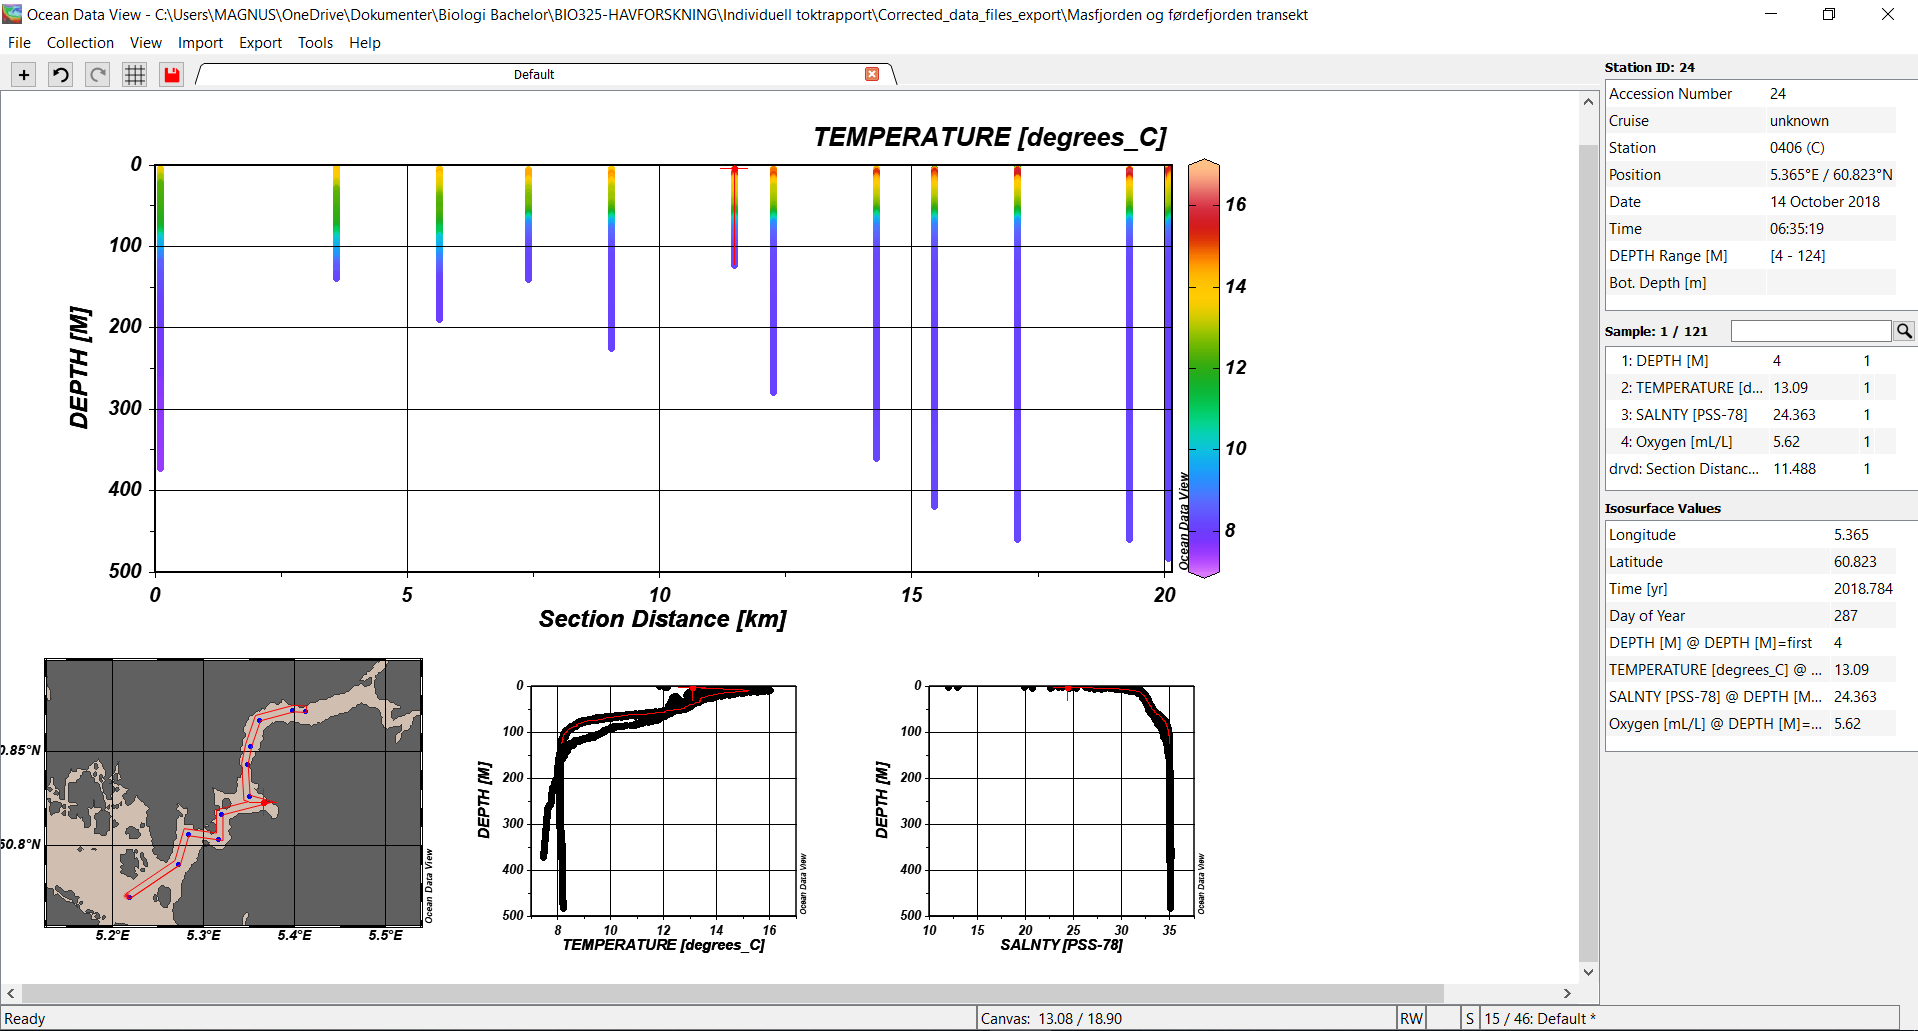
Now a figure with temperature should appear.

Right-click on the image, then select Properties, Display Style, mark Gridded field and choose DIVA gridding.

Switch to the Data tab and select your variable of interest in Z-Axis.

This is how your graph should look like.

To unmark the vertical lines for the stations, remove the tick from Draw marks in the Display Style tab and press OK.

Go to File and select Save Canvas As....

Importing CTD data into Excel

NB! If you just want to import your data directly from CTD into excel, you have to open ODV, and from here go to Import, sea bird CNV, select all files and Open. (As shown here, in the beginning).

So now that we already have imported our CTD data into ODV, we want to import it into Excel to make a spreadsheet. To do this, go to Export, then Station Data and ODV Spreadsheet File..., and then save your data into a folder.

Click Export, Station Data, then ODV Spreadsheet File....

and Save.

Select all variables and OK.

Press OK.

Change the Missing value string to NA.

After you have changed the Missing value string to "NA", and then pressed ok, you should have saved the file. You should now be able to find your file in whatever folder you saved it in on your computer.

IMPORTANT! You have to check the text file BEFORE importing it further into Excel. Depending on what type of Excel version you have (Norwegian, English, etc.) you might have to change the decimal point setting (e.g. "." and ","). For those who have a Norwegian version, you have to change all the
decimal points from "." to ",".

The text file should look something like this.

Open your text file, and then you choose a text editor program. On mac, select cmd f, and on PC select edit then replace, and then replace the "." with "," for the whole file (use replace all). Click on your text file and then open it in Excel.

Click on your text file and then open it in Excel.

Make a graph or represent your data set in whatever way you want.

Importing CTD data into R

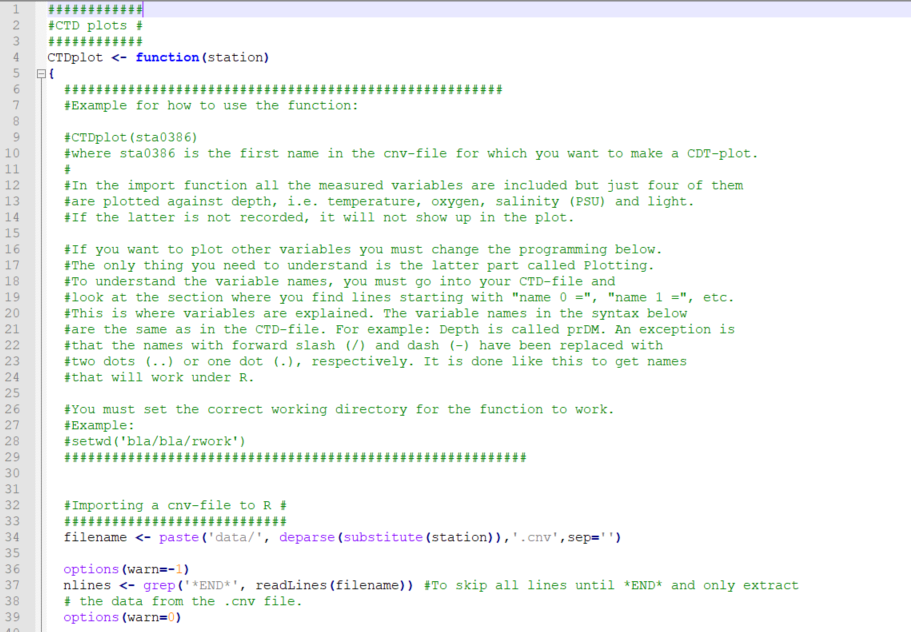
This is an example of a script that retrieves the CTD data from the CNV-file and create graphs of the 4 physical properties for the specific station.
Download it in its original R format.

This figure shows how the data could look when it is transferred into R.