Authors: William Aure Aannø, Cathrine Onarheim, Hege Skaar & Ingunn Stautland
Introduction
Phytoplankton need light for photosynthesis, and many animals are dependent on light for vision. Biologists therefore study light in the fjords to obtain knowledge about the conditions for primary production and the vertical structure of the biological community.
Light measurements can be used to estimate the coefficient for attenuation of downwelling irradiance in water, the constant K, via the formula:  where
where
- z is depth,
- I0 is the irradiance in surface water,
- Iz is the irradiance at depth,
- K is the light attenuation coefficient.
When we measure the light intensity just below surface and at various depths, we can calculate the light attenuation coefficient K for the water column, which tells us how much light is being lost with depth. This can for example be used to model how the phytoplankton is distributed vertically in the water column.
While doing the measurements onboard a research vessel, the intensity of the incident light will change continuously. Measurements are usually taken during either dusk or dawn, and the incident light will therefore quickly decrease or increase, respectively. To account for this, two different light probes are needed. While a spectroradiometer that measures the irradiance in water is lowered down to specific depths, a light-meter placed on the roof of the boat simultaneously measures the light intensity above surface. It is important that as much light as possible is turned off on the boat while taking the measurements, to avoid disturbing the results.
In the first step of this tutorial you will learn how to retrieve data from the field, using two light-meters and the software MSDA_XE. In the second step you will calculate the K-values from the data using MS Excel, and in the third step you will learn how to use the computing environment MATLAB for numeric modelling and visual representation of the data.
Step 1. How to use MSDA_XE for retrieving light measurements.
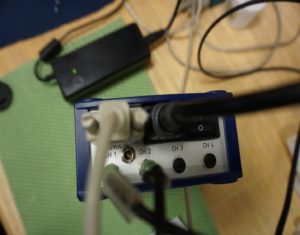
Make sure the cables are connected correctly to the “TriOS Optical Sensors” machine before you turn it on.
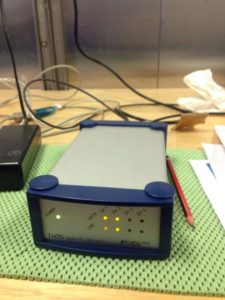
Turn on the “TriOS Optical Sensors” machine. The machine should have lights like this when it is on and ready to use. If you do not get the correct lights, check that the cables on the backside are plugged in correctly.
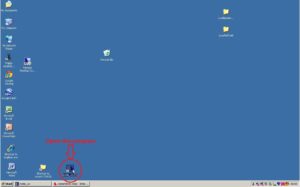
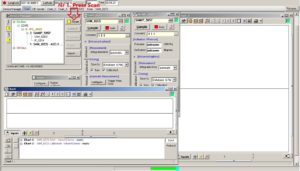
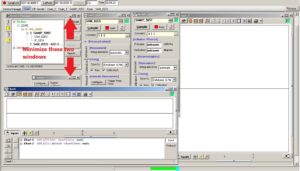
When the program has opened, press the button Scan. Note that there is a yellow square on that button.
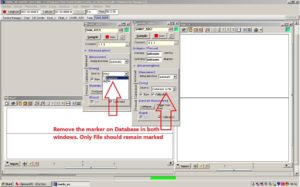
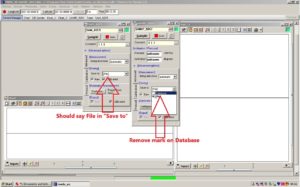
In both windows called SAM_82C5 and SAMIP_5057, there is an alternative called [Storing] with an option called Save to. This is automatically set to [Database & File]. Change this so it reads [File]. The marker on [Database] needs to be removed so that it is only marked for File.
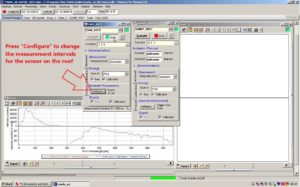
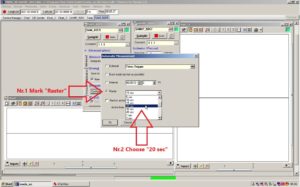
Press Configure... to change the measurement intervals for the sensor on the roof. SAM_82C5 is the window applying to the sensor on the roof. Configure... is found under [Automatic Measurements].
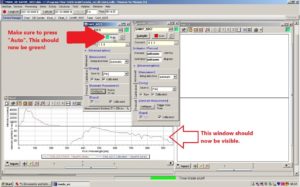
Make sure to press the button where it says Auto in the window for the sensor on the roof. The square next to Auto should now be green and a new window called Chart should be visible at the bottom of the page.
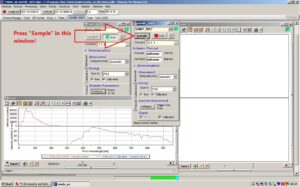
Press Sample on the window called SAMIP_5057. This window belongs to the sensor in the water. A new window named Chart_3 should now be visible on the right side.
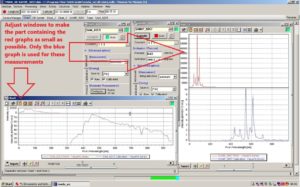
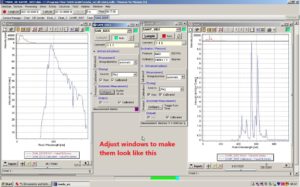
In the two new chart windows, adjust the graphs inside so only the blue graph is visible, as this is the one used in the measurements.
Adjust the position and size of the chart windows so that they are easy to read. Place the chart window belonging to the sensor on the roof on the left side of SAM_82C5. Place the chart belonging to the sensor in the water to the right of SAMIP_5057.
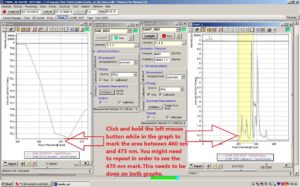
Click and hold the left mouse button while in the graph of the chart window to mark the area between 460 nm and 475 nm. You might need to repeat this process in order to see the 470 nm mark on the graph. Make sure this is done on both graphs.
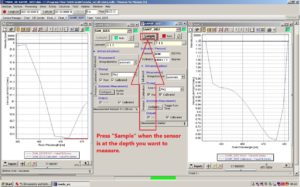
Press Sample on the SAMIP_5057 window when the sensor in the water is at the depth you want to measure.
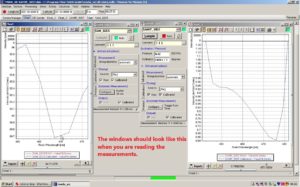
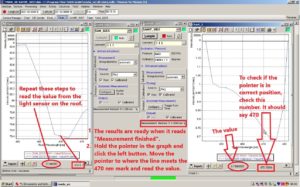
The results are ready when Measurement finished can be read on the bottom of the SAMIP_5057 window. Hold the pointer in the graph of the chart window and click the left button. Move the pointer to where the line meets the 470 nm mark and read off the value. Do this on both graphs.
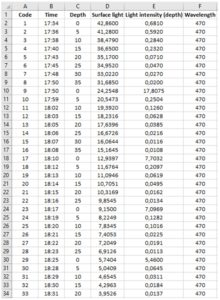
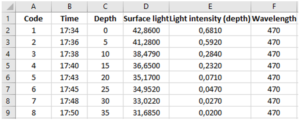
Make an Excel form where you note down the data that you read. It should look like this picture. There should be a column for Code, Time, Depth, Surface light, Light intensity (depth), Wavelength, and Comments.
Repeat the last two steps to take more measurements. Measurements are taken every 5 m until the intensity reaches 0,02 mW/(m2 nm). Then do one more measurement, before going to the surface!
Repeat procedure until satisfied.
Step 2. How to calculate values for the light attenuation coefficient K in MS Excel.
You now have data for time, depth, light intensity at surface, light intensity at depth and wavelength of the measured light.
You will look at one measured water column (0 to X m) at a time (in this example, we used 0 to 35 m).
Make three new columns named Correction factor, ln(light at depth) and corr. ln(light at depth). In the next three steps, you will learn how to calculate these values.
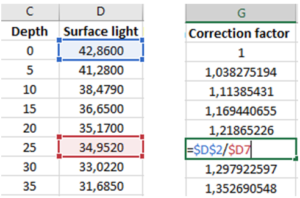
Correction factor: divide the value for surface light measured when the spectroradiometer is at 0 m (marked with blue in the figure) by the value measured when it is at each of the different depths, beginning with 0 m. When typing in the formula, place the $ sign in front of rows or columns that should be locked, as shown in the figure. Then select the cell with the formula and drag the selection down to the cell for the last depth. To check if the formula is correctly copied, select a cell and click in the formula bar so that the operation is displayed.
ln(light at depth): use the function =LN() and choose the value for light intensity at 0 m. Copy the formula using the same technique as in the above step to calculate the logarithm of the light intensity at each of the different depths in the water column.
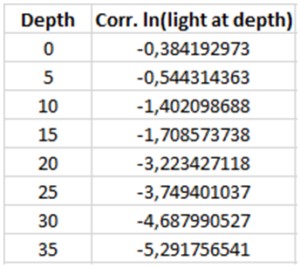
Corrected ln(light at depth): multiply Correction factor with ln(light at depth) for each of the different depths.
Make a scatterplot showing the relationship between the two variables corr. ln(light at depth) and Depth. To plot the data, mark the two columns of interest and insert a scatter chart by selecting Scatter in the chart menu.
Right click on the data points in the plot and press Add Trendline.
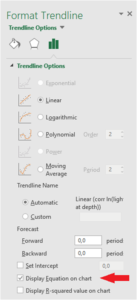
Options for formatting the trendline will appear on the right side. Tick off the box that says Display Equation on chart.
The following linear function for the least-squares regression line will appear in the plot: 
which is equivalent to the equation
Note that the slope of the regression line is the negative of K, so when reading off the K-value, remember that it should be a positive number. In this example K is 0.1515 m-1.
Repeat the procedure for each of the water columns you will estimate K for and write down the values. Have at least 5 replicates (water columns).
Step 3. Using the light data to simulate how light attenuation affects the phytoplankton community.
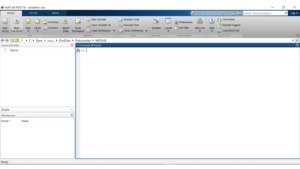
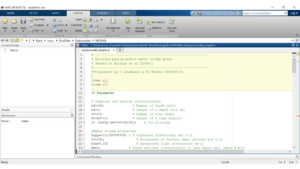
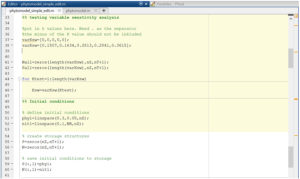
Open the script. For the modelling done in this tutorial we used a script developed by D.L. Aksnes and C. Lindemann for the BIO325 course. If you open more than one script, these will be opened in a separate tab like in the picture.
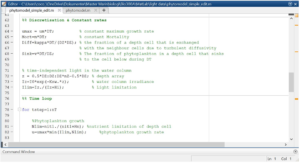
In the script you can specify different parameters like the length of each depth cell and number of time steps (nT) the simulation should run for. All parameters are explained in the script and following pictures.
The K-values you got from Excel need to be put where it says varKsw=. It is safest to put them in an increasing order.
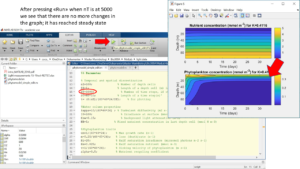
Change the nT (time steps) to 1000. Press run to run the script. Check the figure if it reaches a stable state in the last steps. This is controlled by looking for changes in the phytoplankton concentration. The lines should be straight for the last steps. This is indicated with a red arrow in the picture.
As the previous figure did not reach a stable state, we change the number of steps (nT) to 5000 and run the simulation model again. This time, when checking the model, we can see that it has reached steady state.
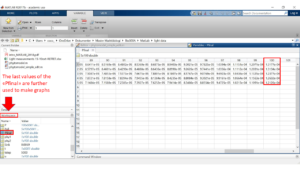
Find the column named workspace. This can be located either at the right or at the left side of the screen. In this column find the variable named Pfinal and press it. A matrix with numbers should appear. These are the values we get from the simulation for every K-value. There is one per depth per K-value. These are taken from the last step where the model is in steady state.
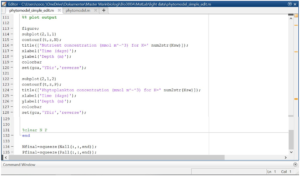
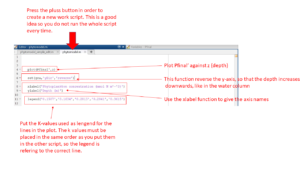
Make a new tab by pressing the + button next to the tab you already have open. This is so that you don’t run the entire script every time. Then you use the function plot and plot Pfinal’ against the depth, z. Like this:
Plot(Pfinal’,z)
Then reverse the y-axis (depth) so that 0 meter will be the depth on the top, making the graph represent the water column. This is done by using the function set then write (gca, ‘yDir’, ‘reverse’). If it is the x-axis you want to reverse, type x instead of y in the command. For the y-axis it should look like this:
Set(gca,’yDir’,’reverse’)
To label the axis use the function xlabel and ylabel. In the parenthesis write the names you want to give to the axis. Remember apostrophes on both sides of the name. For example:
xlabel(‘Phytoplankton concentration’)
ylabel(‘Depth(m)’)
To give a legend to the figure use the function legend. You want the K-values to be indicated in the figure, so put them in the same order as you did when first typing them into MATLAB. In this way the legend is referring to the correct line in the figure. Remember apostrophes on each side of every new variable. Like this:
Legend(‘0.1507’,’0.1634’,’0.2813’,’0.2841’,’0.3615’)
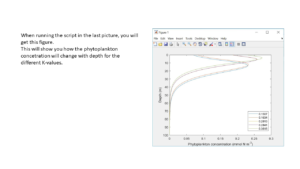
When running the script that you made in the last step, you will get a figure similar to the one presented in this slide. This figure will show you how the phytoplankton concentration changes with depth for each different K-value.
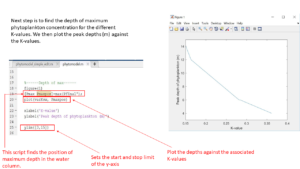
To find the depth where the phytoplankton concentration is the highest for each K-value we use the function Pmax. Write it like this:
[Pmax Pmaxpos] = max(Pfinal’);
Plot the position of the max value against the K-values by writing:
Plot(varKsw,Pmaxpos)
Label the figure in the same way as in a previous step.
You can also limit the y-axis by using the function ylim and specify where the axis should start and stop. The same can be done for the x-axis. Like this:
ylim([3,15])
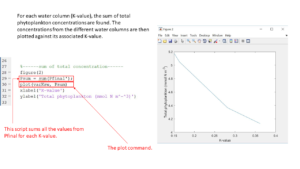
To find the sum of phytoplankton in the water column, we sum all the values from Pfinal for each K-value. This is done by using the function Psum. This is plotted against the K-values. The script will look like this:
Psum=sum(Pfinal’);
Plot(varKsw, Psum)
Label the figure like you did previously.
To find the width of the phytoplankton peak, we find the maximum and minimum values from Pfinal (for each K-value) and multiply this sum by 0.75. The threshold is set at 25% from the peak. Then we find the values that are larger than this threshold by typing
(Pfinal’>((max(Pfinal’)-min(Pfinal’).*0.75))
Then find the sum of the values larger than the threshold. This is the depth range for the K-value. Plot it against the K-values. Label the figure like you did previously.
The script will be:
(max(Pfinal’)-min(Pfinal’).*0.75.
(Pfinal’>((max(Pfinal’)-min(Pfinal’)).*0.75.
depthrange=sum(Pfinal’>((max(Pfinal’)-min(Pfinal’)).*0.75)).
plot(varKsw, depthrange)
In summary
With this protocol we have learned how we can measure light in the fjords with use of light-meters and the software MSDA_XE while onboard a research vessel. We have also learned about light attenuation and how we can use the field data to estimate the coefficient K for attenuation of downwelling irradiance. Finally, we used the programming environment MATLAB for sensitivity analysis, where we modelled how the concentration of phytoplankton at various depths in the water column responds to changes in the value of K. These skills enable us to study light in the fjords to see how it affects primary production and the vertical distribution of phytoplankton.

